
Wondering how to use a dowel jig? Or even what a dowel jig is?
Read on to find out all about this technique for joining wood below!
Contents
How to Use Dowel Jig: 8 Easy Steps – Introduction
Using a dowel jig is an integral part of millwork. The key factor in working with wood is precision and patience.
Precision is required while measuring the wood, cutting it and finally joining it. Patience is required because it is a comparatively tedious process.
The joining of wood is the most important factor which determines the overall outcome.
For the very reason, dowels are used. Dowels are basically lag threaded studs which are used in fastening of two pieces of wood.
This helps in keeping the wood in same position. Unlike the normal studs these have wooden screw threads at both the ends.
Dowels are used in flooring, creating joints, furniture, attaching balusters to stairs and so on.
Due to lack of a proper head a driver is needed to install a dowel.
Many alternatives to dowel like plasters or biscuits are available in the market.
However, the simplicity, accuracy and strength of dowels cannot be matched.
Hence, most of the people still prefer dowels over anything else.
For proper installation of a dowel a jig is used. The jigs can make a hole with precision than a machine can.
It helps in maintaining accuracy for proper joining of wood.
The dowel jigs are available in various shapes and sizes so different types of joints can be created.
As one type of joint is not suitable for every operation. Hence, dowel jigs can be incorporated to create different joints and making the process a tad easier.
How Does a Dowel Jig Work?
A typical dowel jig consists of a steel body to help in keeping the wood in place.
The wood has to be steady throughout the operation. Mostly people use a hand to keep the wood in place.
However, the vibrations caused by the drill render it difficult. The problem is thus easily solved by using a jig.
The sturdy construction is provided so the wood is steady and the drilling is thus easier.
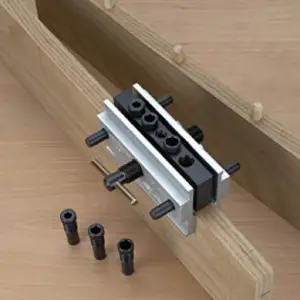
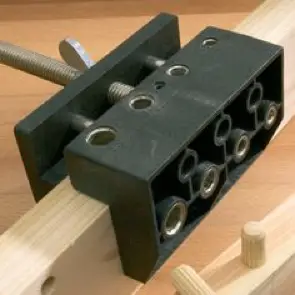
As you can see in the image, the steel body is contained with holes which are provided for inserting the drill.
Holes can be of various shapes and sizes. The holes are mostly threaded from inside so to allow make an easy way for the drill.
The holes centred exactly with the block. You can notice a centre line which runs through these holes.
They can be seen from the windows. The centre lines are provided to help you in maintaining in the centre of the jig while working.
A screw can be seen passing through the block. The screw is provided for adjustment.
The screw when rotated aligns the wood from both the sides.
It works as a clamp. Thus, helps in keeping the wood steady as well as adjusting it according to the operation.
How To Choose The Right Dowel Jig?
With advancing craze for DIY among people, most people today prefer working on their own rather than hiring someone.
This has given a boost to the market and various dowel jigs are available both as cheap and expensive versions.
You can easily fall for the expensive ones which are rendered attractive to entice the customer.
However, these jigs when used turn out to be flimsy and not worth the cost.
So, price should not be your first criteria while choosing a jig. You can find a better jig at cheaper cost.
Secondly, the holes in the jig should be threaded otherwise drilling would get difficult.
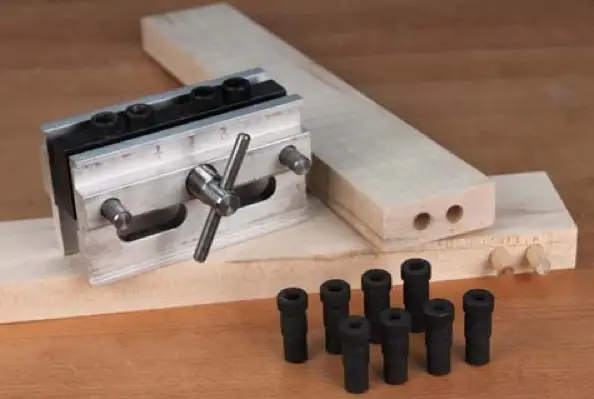
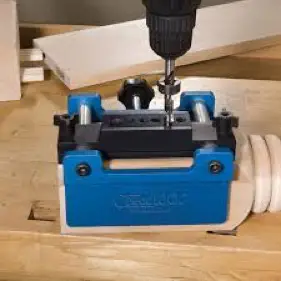
The self centring jig as shown in the picture above is best for most of the operations.
The best thing to do is research properly. Talk to millworkers, search online, read reviews and then decide.
The first thing to start with is searching online. You can see the opinions of others as well as can easily find loopholes yourself.
Most of the dowel jigs are of 4 types:
The mundane model
The basic or mundane model of the dowel jig consists of various holes of different sizes for the drill bits.
Sometimes you need to make use of more than one dowels in a wood. For using one than one dowel you need to move the wood a bit.
The alignment gets disrupted and it can cause a problem. Make use of this basic dowel jig if you need to move the jig for your operation.
Dowel jig with bushing
Apart from the basic models some of the dowel jigs comprise of bushings.
The bushings are of different sizes which screw into threaded holes. The threaded holes help in drilling with the same size without even moving the jig.
The jig usually consists of one hole with bushing and another hole with drill bit which is devoid of bushing.
Dowel jig with extra bushing
This model is designed with extra bushing. So, four bushing holes are provided.
Four of these holes are threaded providing you enough space. You can easily drill four holes at a time without moving the jig.
However, the extra bushings are to be purchased separately along with the jig.
Dowel jigs with large capacity
As mentioned jigs are of various shapes and sizes.
You can choose from this wide variety depending on your operation.
Large jigs are needed for big operations. The jigs large in size can hold up to 6 inches or more.
How To Use a Dowel Jig? – Step by Step Process
So, now you are completely acquainted with the dowel jig and its heart.
Now is the time to finally get to know the working. It is advised to first know the working and then use it accordingly to avoid errors.
The dowel jigs might look tricky but it can be quite easy once used properly.
It depends on you and the quality of work you expect from yourself.
Follow these basic steps and put your hands on the jig.
Step 1
The first step is to loosen the dowel jig. The jigs when purchased usually come with screws which are tightened.
You need to loosen the screws in order to align it along the wood.
Step 2
The next step is the finally get the wood logs you want to work on.
Use a measuring tape or a measuring scale and mark the locations on the wood.
Mark the centre of the wood and create a line along the centre. Do not forget to mark the sides for making a hole.
Step 3
Now, you are ready with the jig and the wood.
The next step is to align the both.
Make sure that the centre of the wood matches accurately with the jig.
Align the centre line of jig with that of the line marked on the wood. Match the marks on the sides as well.
Step 4
Place the dowel jig according to the alignment on the wood and tighten the bolts.
Do not tighten them much as it will be difficult for you to remove.
Tighten the bolts so that the wood cannot move and the drilling is not affected.
Step 5
Now, you can finally get your hands on the drill. Double check the jig and make sure that the wood is steady.
Start with a low speed of the drill and put in the black holes of the jig.
You can even change the size of the hole if you find difficulty while inserting the drill.
Step 6
Now, take the other piece of log you want to work on and repeat the same process.
Make sure the alignments on the second wood log are according to the first one.
Step 7
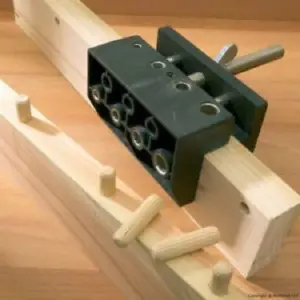
So finally you are ready with the holes. The next thing to do is put the dowels into holes and finally join both of the logs together.
Make sure that the holes of both of the woods match accurately.
Step 8
Double check your work. Check if the joints are properly attached.
The last thing to do is gluing. Glue the dowels with a good wood glue for better protection.
How to Use a Dowel Jig – Conclusion
We hope this article has helped explain not only how to use a dowel jig, but also what dowel jig to purchase and even what a dowel jig is in the first place.
Here are some other related articles that you may find interesting:
How To Use Dowel Screws
Best Crown Moulding Jigs
Best Wood Jointers

About The Author: Hi There! I’m Dave. I’m a certified millworker and carpenter, and have been working in the industry for over 10 years. I created this website to pass on my knowledge so that other enthusiasts, no matter what their skill level, can enjoy the craft as much as I do. I hope you enjoy!