
Welcome to my article all about how to stabilize wood!
Wood comes in handy in various applications. It can be used to make knife handles, furnishings, structures and more.
It’s a durable and attractive material.
But if there’s one downside to wood, it’s that it tends to expand.
The expansion changes the shape of the wood which can make the item look unattractive.
You can prevent this from happening through wood stabilization.
This article will discuss the methods you can use to stabilize wood to ensure your items look their best.
Let’s dive in!
Contents
How Do You Stabilize Wood?
Stabilizing wood involves injecting a soft or rotted piece of wood with a resin or wood hardener, so it becomes more durable.
A resin epoxy, thermosetting resin or vacuum chamber can also be used.
It ensures the wood won’t become damaged in the manufacturing process. It makes the wood easier to work with.
The type of stabilizer you use will vary depending on the type of wood you’re working with.
Resin is best for reversing the aging process of soft wood.
While it can also be used on rotten wood, the preferred method for this would be a vacuum chamber that extracts air and over pressurizes the wood to create empty pores in its exterior.
A Plexiglass may also be used to improve the color of the wood.
During the stabilization process, you basically want to extract all the moisture from the wood.
If any moisture is left, the item will not be considered sufficiently stabilized.
Once the product is stabilized, it becomes like a hybrid mixture of plexiglass and wood.
It makes for a material that’s a lot more durable and a lot more resistant to weather, chemicals, and UV rays.
Why Does Wood Need to Be Stabilized?
If you work with a wood that’s too soft, it can be difficult to shape it or even hold it in place.
Harder wood will be easier to mold, and it will also look better as a completed product. It will hold up well without losing its shape or value over time.
Is Stabilizing Wood Safe?
Yes, stabilizing wood is a non-toxic process that does not harm people or animals.
The liquified resin has been shown to be safer than hardening resins.
The only precaution that’s advised while stabilizing wood is not to perform the task at excessive temperatures.
If temperatures go above 120 degrees Celsius, the wood will smear and may cause eye injuries if goggles aren’t worn.
Because wood stabilization is relatively safe, it’s often a DIY project. It can be done outdoors or indoors.
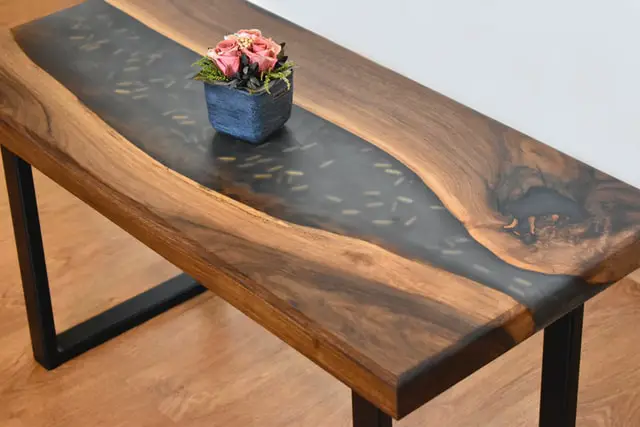
What Can Be Made with Stabilized Wood?
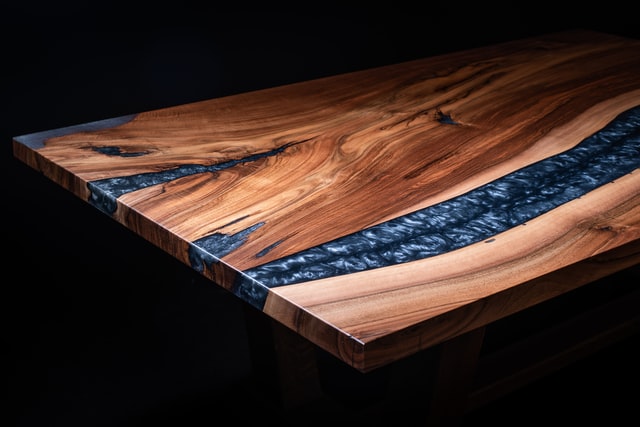
Once wood is stabilized, it forms a highly attractive grain which makes it desirable for a wide range of applications.
And because it’s so nice looking and durable, the items it creates tend to go for a higher price.
So, while the process is difficult, it’s well worth it.
Stabilized wood can be used to make any of the following:
- Knife handles
- Pen handles
- Bowls
- Dishes
…and other wooden necessities.
What Type of Wood Can Be Stabilized?
Not every type of wood can be stabilized, some can’t be stabilized at all, and others won’t stabilize well.
Stabilization works best on woods that have large pores that allow them to absorb the stabilizing material.
Woods that take well to stabilization include:
- Beech
- Polar
- Birch
Once these woods are stabilized, they will come out looking great… and even better after a good polish.
Dyes and MMA can also be added to color the wood after stabilization is complete.
It is recommended that you buy the stabilizer and MMA from the same supplier. They will be able to suggest a tone that will work best on the wood.
And while beech, polar and birch take well to stabilization, there are some types of wood that don’t.
These woods have smaller pores that don’t soak up resin well:
- Olive
- Softwood
- Rosewood
- Ebony
How to Stabilize Wood with Various Products
Now let’s look at how to stabilize wood using various products:
Thermal Hardening Resin:
Thermal hardening resin’s warmth allows it to soak through the surface as well as the center of the wood, so it impregnates the pores.
It will work best if the wood has a low moisture content. Heat is necessary in the process. Therefore, it is conducted in the oven.
Cactus juice is often used as a thermal hardening resin. It must be baked in an oven before it’s used for stabilizing purposes.
The wood must also be baked in an oven to ensure moisture is eliminated.
It will need to be baked a full day at 104 degrees Celsius.
Epoxy Resin:
Epoxy resin is used to stabilize softwood.
It will work better when processed at 15 to 25 degrees Celsius.
Unlike the thermal hardening, it will not fully penetrate the wood, it will just absorb into its surface.
Using epoxy resin for stabilization is tricky as it’s important not to allow any dirt to seep through.
Therefore, you may be best off getting a professional in for the job.
It’s also a good idea to add a thinner to the resin. The thinner will help the resin penetrate the wood.
The area should be well ventilated throughout this process.
Wood Hardener:
Wood hardener will work best on damaged wood.
Because it is clear, it will not change the color of the wood. It is easy to apply and most DIYers will be able to do the job themselves.
However, like epoxy resin, it will not fully absorb into the wood so it’s not the best option for every task you’re trying to achieve.
Vacuum Chamber Stabilization:
If you don’t have a vacuum chamber, you may have to invest in one for the stabilization process.
Using one involves putting the wood inside the chamber so it can suck the moisture out.
You then introduce an acrylic resin that saturates the wood. Remove it from the chamber to allow the resin to cure.
A heat treatment is typically used to assist in the curing process.
Thermosetting Resin:
Thermosetting involves using an oven to dry out the wood.
The wood will need to bake at 104 degrees Celsius for 24 hours to fully stabilize.
How to Make Sure You’re Ready for the Stabilization Process
Here are some steps to take to ensure you are ready for the stabilization process:
- Make sure you have all the necessary equipment at your disposal.
- Check the equipment for damage and dirt before you use it. It’s especially important that your vacuum chamber is not damaged if you’re using it for stabilization purposes.
- If you are working with resin, use protective gear like an apron, gloves, and goggles.
- Wash resin off immediately if it gets on your skin.
- Keep all your tools nearby to ensure stabilization runs smoothly.
How Long Does Wood Stabilization Take?
Wood stabilization can take between 4 and 24 hours.
A low-end wood will take 4-6 hours to stabilize while a high end wood takes closer to 24.
This is because high end woods have larger pores and take a longer time to evacuate air.
How To Stabilize Wood: Conclusion
Stabilizing wood can make a big difference in ensuring your project comes out great.
Now that you know the various stabilization methods, you are ready to get started on creating high quality wood products.
I hope this article has helped you pinpoint the right wood stabilization method for your project.
If you enjoyed this article, here are some more articles you might like to read:
How To Remove Wood Glue
How To Remove Acrylic Paint from Wood

About The Author: Hi There! I’m Dave. I’m a certified millworker and carpenter, and have been working in the industry for over 10 years. I created this website to pass on my knowledge so that other enthusiasts, no matter what their skill level, can enjoy the craft as much as I do. I hope you enjoy!